Teams
Microsoft Teams is a platform that combines workplace chat, meetings, notes, and attachments. The service integrates with Office 365, including Microsoft Office and Skype, and features extensions that can integrate with non-Microsoft products as well.
Get started with Teams
Short video guides External link, opens in new window.
- Basic information
- Create Team
- Channels and messages
- Files and file management
- Chat, calls and meetings
Frequently Asked Questions External link, opens in new window. (external link)
Start an interactive demo of Teams External link, opens in new window. (External link)
Team types in Teams External link, opens in new window. (External link)
Microsoft Teams Help Center External link, opens in new window. (External link)
Guide to converting an Office 365 Group to a Team pdf, 224 kB.
Guide for Shared channels pdf, 949.7 kB, opens in new window.
Turn of notification for calendar events in Teams docx, 184.2 kB, opens in new window.
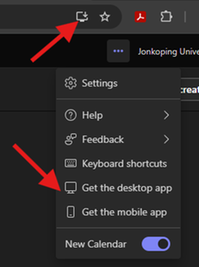
Install the Teams Client
If you don't have the Teams client on your computer you can install it from Teams Online. Go to portal.office.com -> Log in -> go to Teams -> click on the download icon in the upper right corner.
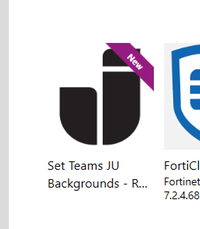
JU backgrounds in Teams (staff)
If you don't have JU backgrounds in Teams you can download images from the intranet External link, opens in new window. and upload manually to Teams.
Important notes regarding converting an existing Group
In general, nothing is deleted from the Office 365 Group when converting it to a Team. However, the contents of the Group is not automatically displayed in the newly created Team. To access for example files and folders or OneNote, please see below.
Files
Microsoft Teams stores documents and files in a folder in the Document Library which is named for the Channel. By default, the only channel that exists in a new Microsoft Team is named “General”. This means that any files/folders from the Group existing before the creation of the Team will have to be moved.
OneNote
In your Teams client, go to the channel of your preference, and click on the “+” sign to add a tab to that channel. You’ll be presented with a number of options. Select the one that says OneNote. Create a new OneNote notebook, and name it whatever you like. Then move or copy the individual pages from the old OneNote to the new notebook.
Planner
First you go into the new Microsoft Team and select the “+” sign to add another tab to the appropriate channel. Click on the Planner icon. In the next dialog window, select “Use an existing plan”, and from the drop-down menu, select the name of the appropriate Office 365 Group.